How to create a contact form easy with React without backend and free

No matter you are building, if you have something public, you need to create a contact form to know the customers' feedback, this is very important because you can get a lot of improvements from your customers.
Now I show you what I use when I need to implement a contact form using React to do this.
In short, I use nextjs, @emailjs/browser, and a little time.
I build a new nextjs app using this command (this is no neccesary if you have any app already using React using nextjs or not)
$ npx create-next-app@latest
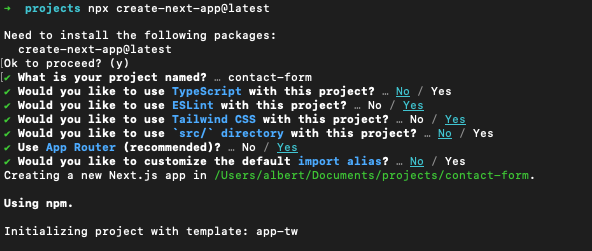
I used the default settings.
Now I go to app/page.js and clear all to put my contact form.
'use client';
import { useState } from 'react';

const ContactForm = () => {
  const [name, setName] = useState('');
  const [email, setEmail] = useState('');
  const [message, setMessage] = useState('');

  const handleSubmit = (e) => {
    e.preventDefault();
    // Perform form submission logic here (e.g., send data to backend)
    console.log({ name, email, message });
    // Reset form fields
    setName('');
    setEmail('');
    setMessage('');
  };

  return (
    <form onSubmit={handleSubmit} className="max-w-md mx-auto">
      <div className="mb-4">
        <label htmlFor="name" className="block mb-2">Name:</label>
        <input
          type="text"
          id="name"
          value={name}
          onChange={(e) => setName(e.target.value)}
          className="w-full border border-gray-300 rounded-md p-2 text-black"
        />
      </div>
      <div className="mb-4">
        <label htmlFor="email" className="block mb-2">Email:</label>
        <input
          type="email"
          id="email"
          value={email}
          onChange={(e) => setEmail(e.target.value)}
          className="w-full border border-gray-300 rounded-md p-2 text-black"
        />
      </div>
      <div className="mb-4">
        <label htmlFor="message" className="block mb-2">Message:</label>
        <textarea
          id="message"
          value={message}
          onChange={(e) => setMessage(e.target.value)}
          className="w-full border border-gray-300 rounded-md p-2 text-black"
        ></textarea>
      </div>
      <button type="submit" className="bg-blue-500 text-white py-2 px-4 rounded">
        Submit
      </button>
    </form>
  );
};

export default ContactForm;

Now add the functionality, first install the dependency;
$ npm i @emailjs/browser
On the top of the form page, you need adding the emailjs dependency import;
import emailjs from '@emailjs/browser';
And in the function called handleSubmit add the emailjs logic
  const handleSubmit = (e) => {
    e.preventDefault();
    // Perform form submission logic here (e.g., send data to backend)
    const templateParams = {
      name,
      email,
      message
    };

    emailjs.send('<YOUR_SERVICE_ID>',
    '<YOUR_TEMPLATE_ID>',
    templateParams,
    '<YOUR_PUBLIC_KEY>')
      .then((response) => {
        console.log('SUCCESS!', response.status, response.text);
      }, (err) => {
        console.log('FAILED...', err);
      });

    // Reset form fields
    setName('');
    setEmail('');
    setMessage('');
  };
The last step is creating an account on https://www.emailjs.com/ it's free and don't require payment method to use.
You need 3 things
- SERVICE_ID
- TEMPLATE_ID
- PUBLIC_KEY
Get the Service ID
When you are in, you need to connect your email provider to the emailjs service, this can do on the Email Services for this example I use gmail
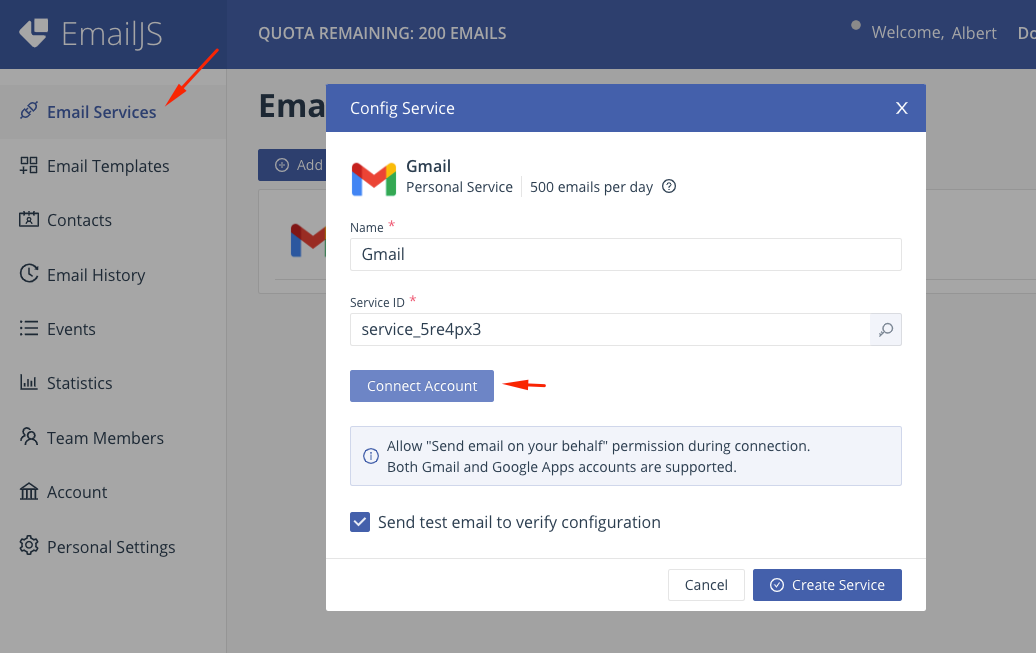
This give you a service id to put it on your code.
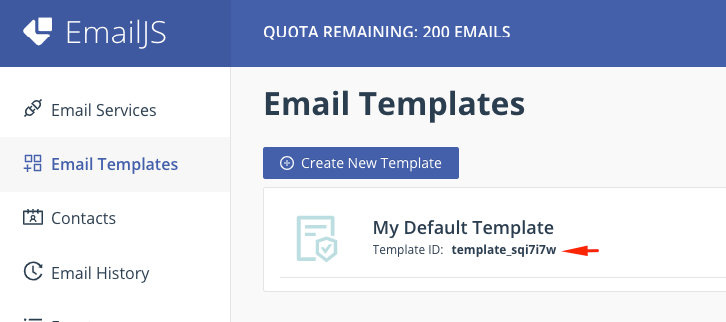
Get the Template ID
To get the Template ID you need to got to the Email Templates and create one.
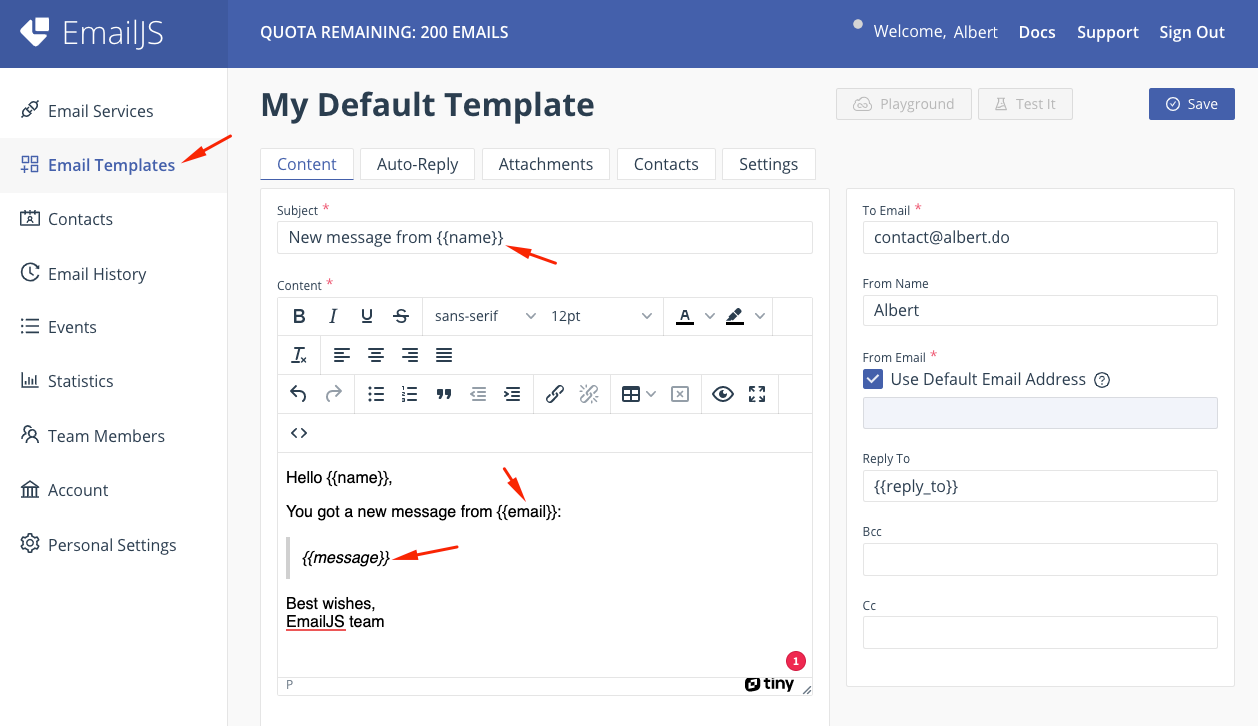
You need to rename the default template variables, in this example I using name, email, and message. Once you created the template, you can get the Template ID
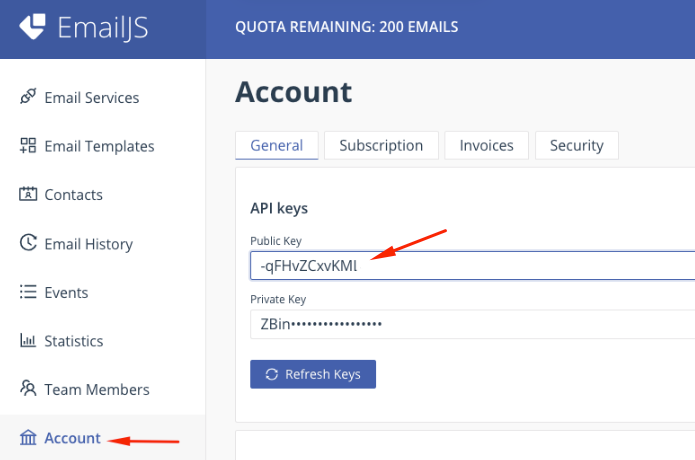
Get the Public Key
To get the public key, you need to go to account and copy this.
And is done! Now you receive mails each time any user want to contact you 😉
Complete code repository: https://github.com/itsalb3rt/nextjs-with-emailjs


